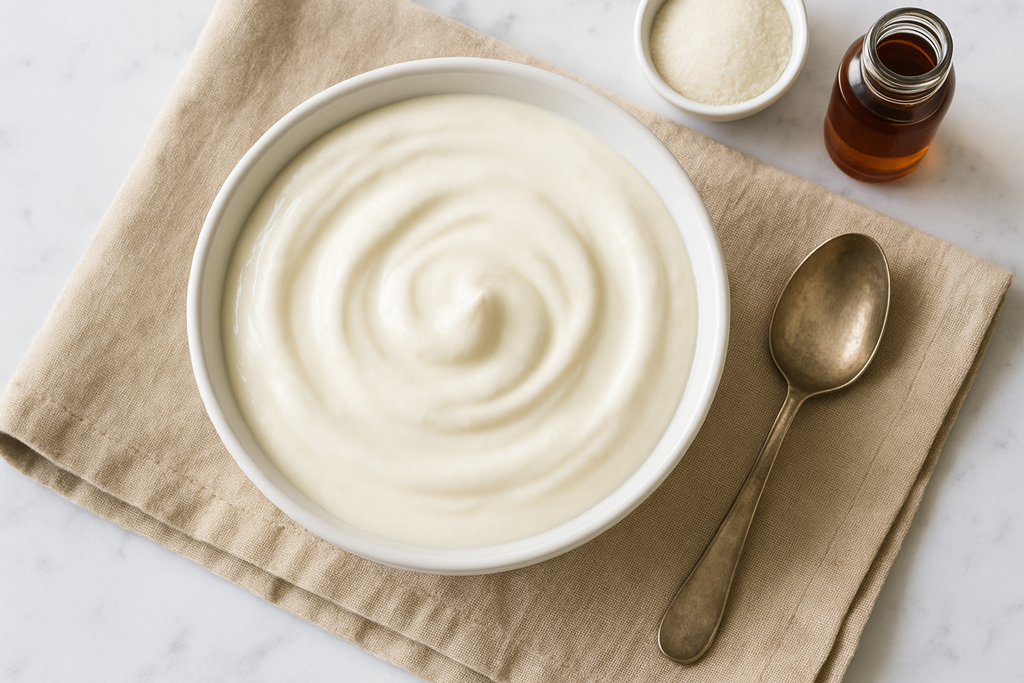
Homemade vanilla yogurt is one of the most rewarding kitchen projects you can take on—especially with a yogurt maker. It’s creamy, rich, naturally flavored, and customizable from start to finish. This Yogurt Maker Vanilla Yogurt Recipe walks you through every step with beginner-friendly instructions and pro tips for thicker, smoother yogurt. Whether you prefer a mild sweetness or a tangier flavor, this recipe gives you full control over the taste and texture. Once you make your own, you’ll understand why homemade yogurt fans rarely go back to store-bought!
Duration / Prep Time
- Prep Time: 10 minutes
- Cook Time: 8–12 hours (incubation)
- Total Time: 8 hours 30 minutes–12 hours 30 minutes
- Servings: 4
- Yield: Approx. 1 quart
Ingredients
- 4 cups whole milk (2% may be used but yields thinner yogurt)
- 2 tablespoons plain yogurt with live active cultures (starter)
- 1–2 teaspoons vanilla extract
- 2–3 tablespoons sugar, honey, or preferred sweetener (optional)
- Optional for thicker yogurt: 2 tablespoons nonfat dry milk powder
Directions
Step 1: Heat the milk
Pour the milk into a medium saucepan and slowly heat it to 180°F (82°C). Heating the milk denatures proteins and helps your finished yogurt thicken properly. Do not boil—remove from heat once it reaches temperature.
Step 2: Cool the milk
Allow the milk to cool to 110°F (43°C). This is the ideal temperature for your yogurt cultures. Too hot will kill the live cultures; too cool can lead to runny yogurt.
Step 3: Mix the starter
In a small bowl, whisk 2–3 tablespoons of the cooled milk with the plain yogurt starter until smooth. Stir this mixture back into the pot of warm milk.
Step 4: Add vanilla & sweetener
Stir in the vanilla extract and sweetener. If using dry milk powder for extra creaminess, whisk it in until fully dissolved.
Step 5: Incubate in the yogurt maker
Pour the mixture into your yogurt maker jars or container. Incubate for 8–12 hours depending on your preferred tanginess:
- 8 hours: mild, lightly tangy
- 10–12+ hours: thicker, more pronounced tang
Avoid moving or shaking the yogurt maker during incubation, as this can interfere with the fermentation process.
Step 6: Chill and set
Refrigerate your yogurt for at least 4 hours before serving. It thickens and develops its final flavor profile as it cools.
Optional: Make Greek-style yogurt
Strain the chilled yogurt through a cheesecloth-lined sieve for 2–4 hours to remove whey and create a rich, thick Greek-style vanilla yogurt.
Nutrition Facts (per serving) — Estimated values
- Calories: 145
- Protein: 8g
- Carbohydrates: 16g
- Fat: 6g
- Sugar: 15g
- Calcium: 25% DV
Pro-Tip:
If you’ve been making yogurt the traditional way—or you’re brand new to the process—a dedicated yogurt maker can completely transform your results. These compact appliances maintain the perfect incubation temperature from start to finish, giving you thicker, creamier, and more consistent yogurt every time. No guesswork, no temperature swings, and no worrying about whether your batch will set. If you don’t already own one, or you’ve been thinking about upgrading, now’s the perfect time—this Yogurt Maker Vanilla Yogurt Recipe really shines when made with a reliable machine. Simply click the button below to explore top-rated yogurt makers on Amazon.
Conclusion
Making your own vanilla yogurt in a yogurt maker is simple, customizable, and incredibly satisfying. With just a few ingredients and a little patience, you’ll create a creamy, fresh, lightly sweetened yogurt that’s perfect for breakfast bowls, smoothies, or healthy snacking. Once you discover how easy it is, you may never reach for store-bought yogurt again. Enjoy your homemade creation—and feel free to experiment with flavors, toppings, and textures to make it your own!